Flash the Image
This section details the steps for flashing your device. Ensure you’ve completed the prerequisites and set up the fastboot tool as described in the previous section.
Note
To obtain the latest firmware image, either build it from source or download a prebuilt image.
See previous sections for details on building or downloading the image.
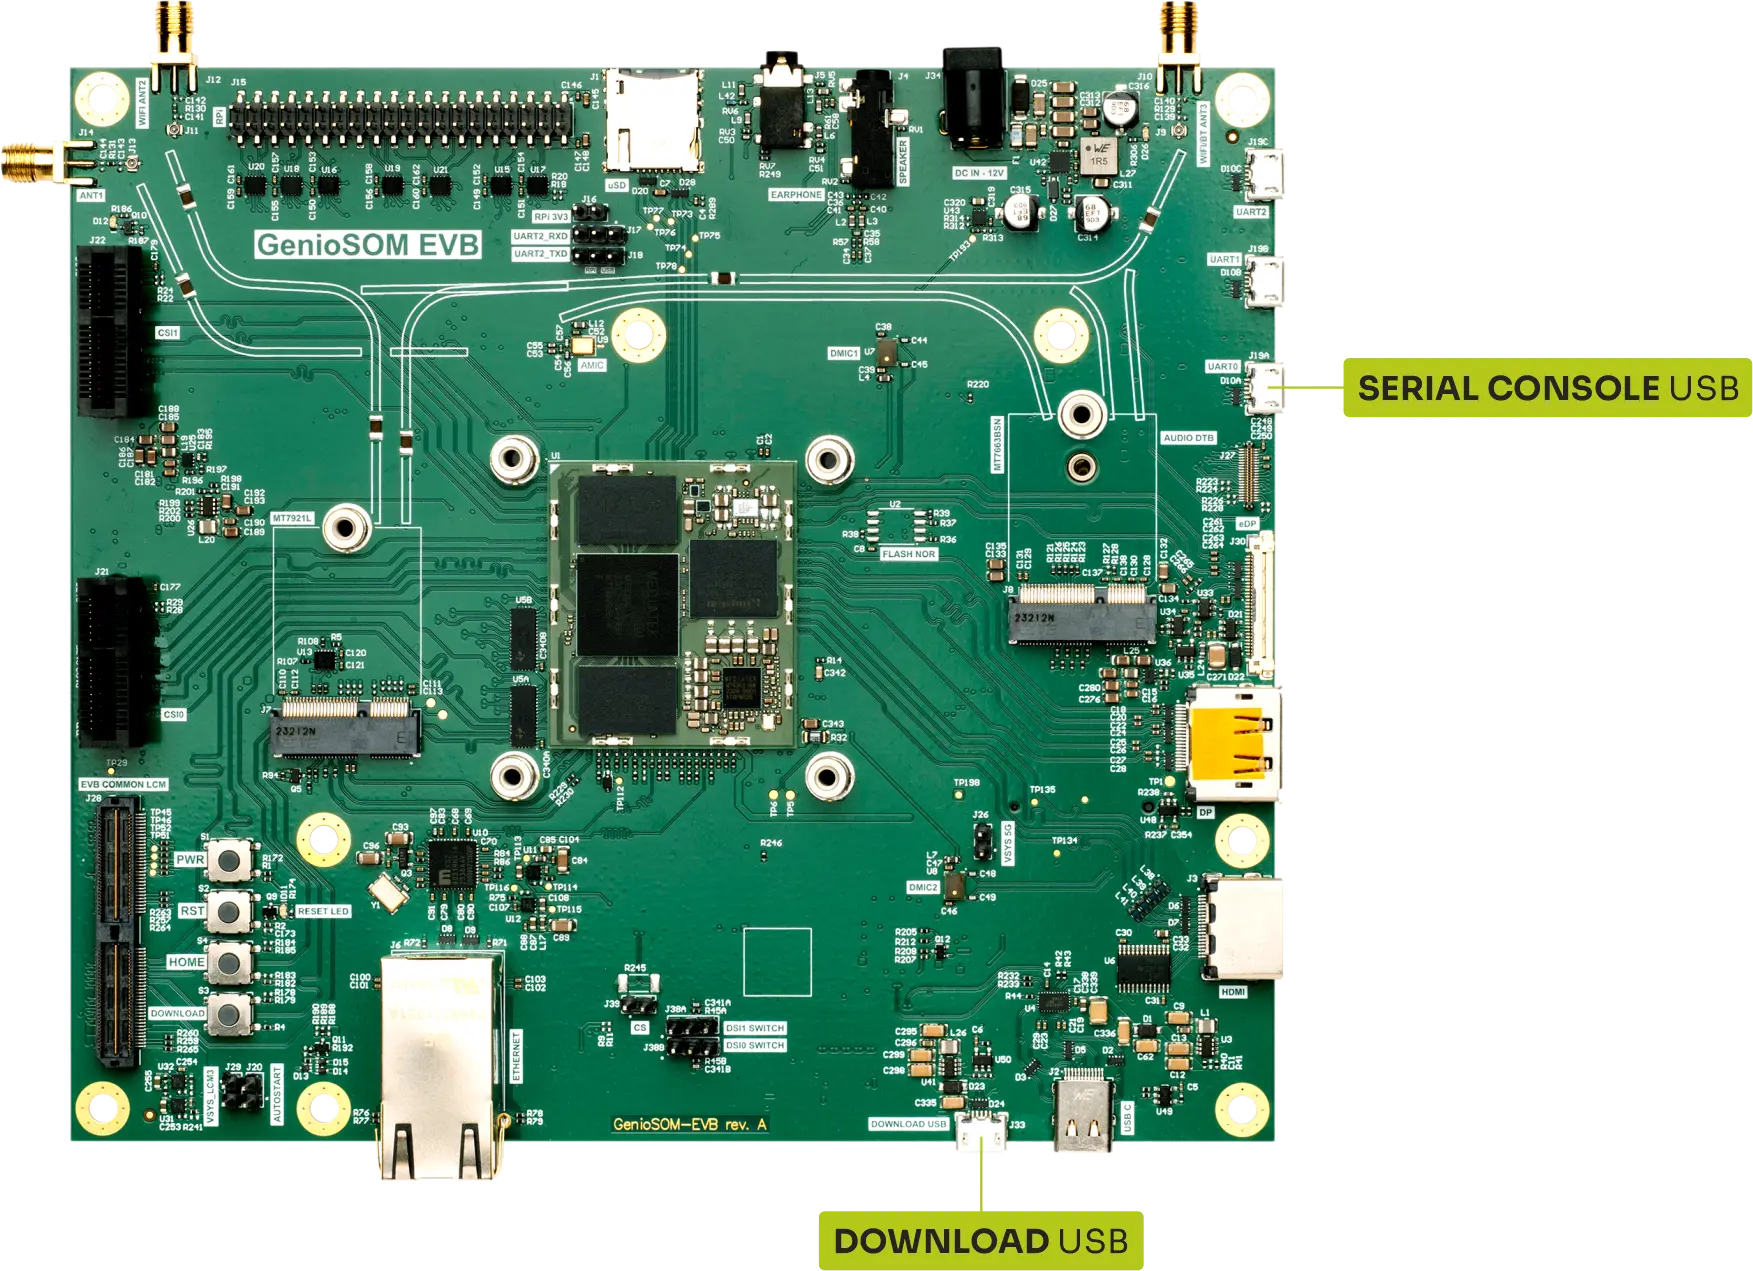
Connect the Board
Flashing Grinn GenioEVB-700 requires:
external 12V power source,
both Download USB and Serial Console USB connected to the host PC.
Flashing
In terminal, go to the directory containing image files and use the following command:
genio-flash
This command will write the image from the current working directory into the Grinn GenioEVB-700.
Note
The genio-flash tool should automatically put the board into download
mode.
You can also put the board into download mode manually as described in the Download Mode section.
Successful flash procedure will report multiple erase and write cycles resulting in no errors.
Device Tree Blob Overlays
By default basic video, GPU and APU DTBOs are loaded.
All available DTBOs can be listed using the following command:
genio-flash --list-dtbo
To select a DTBO, use the --load-dtbo switch.
Loading DTBO example
To flash the Grinn GenioEVB-700 with DTBO for Sony IMX214 cameras connected to CSI0 and CSI1 the following command can be used:
genio-flash --load-dtbo camera-imx214-csi0-imx214-csi1.dtbo
genio-flash also provides interactive interface to select
DTBOs which can be invoked with the -I switch.
Download Mode
The Grinn GenioEVB-700 can be put into download mode manually using physical buttons.
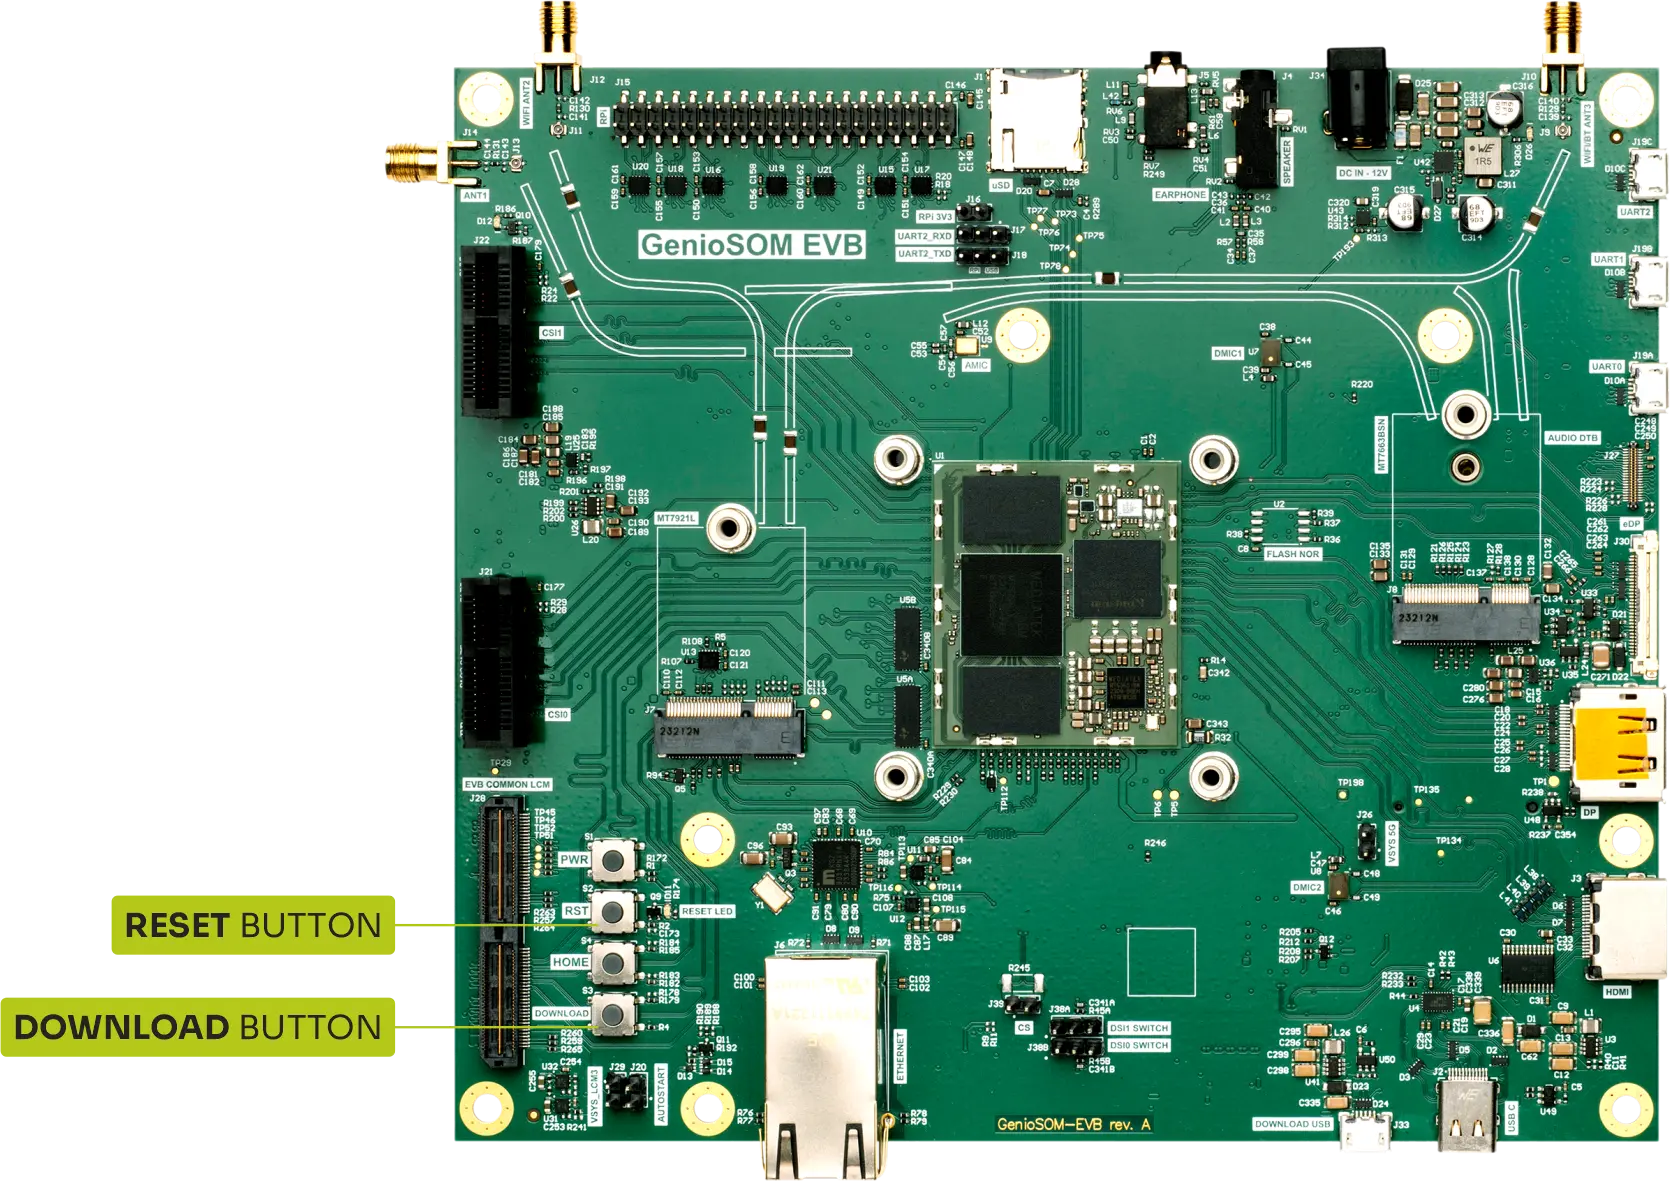
The following sequence should be used:
Press and hold the Download button.
Press and release the Reset button.
Keep the Download button pressed until
Erasing 'mmc0'is shown.