Flash the Image
This section details the steps for flashing your device. Ensure you’ve completed the prerequisites and set up the usb-tool as described in the previous section.
Note
To obtain the latest firmware image, either build it from source or download a prebuilt image.
See previous sections for details on building or downloading the image.
Connect the Board
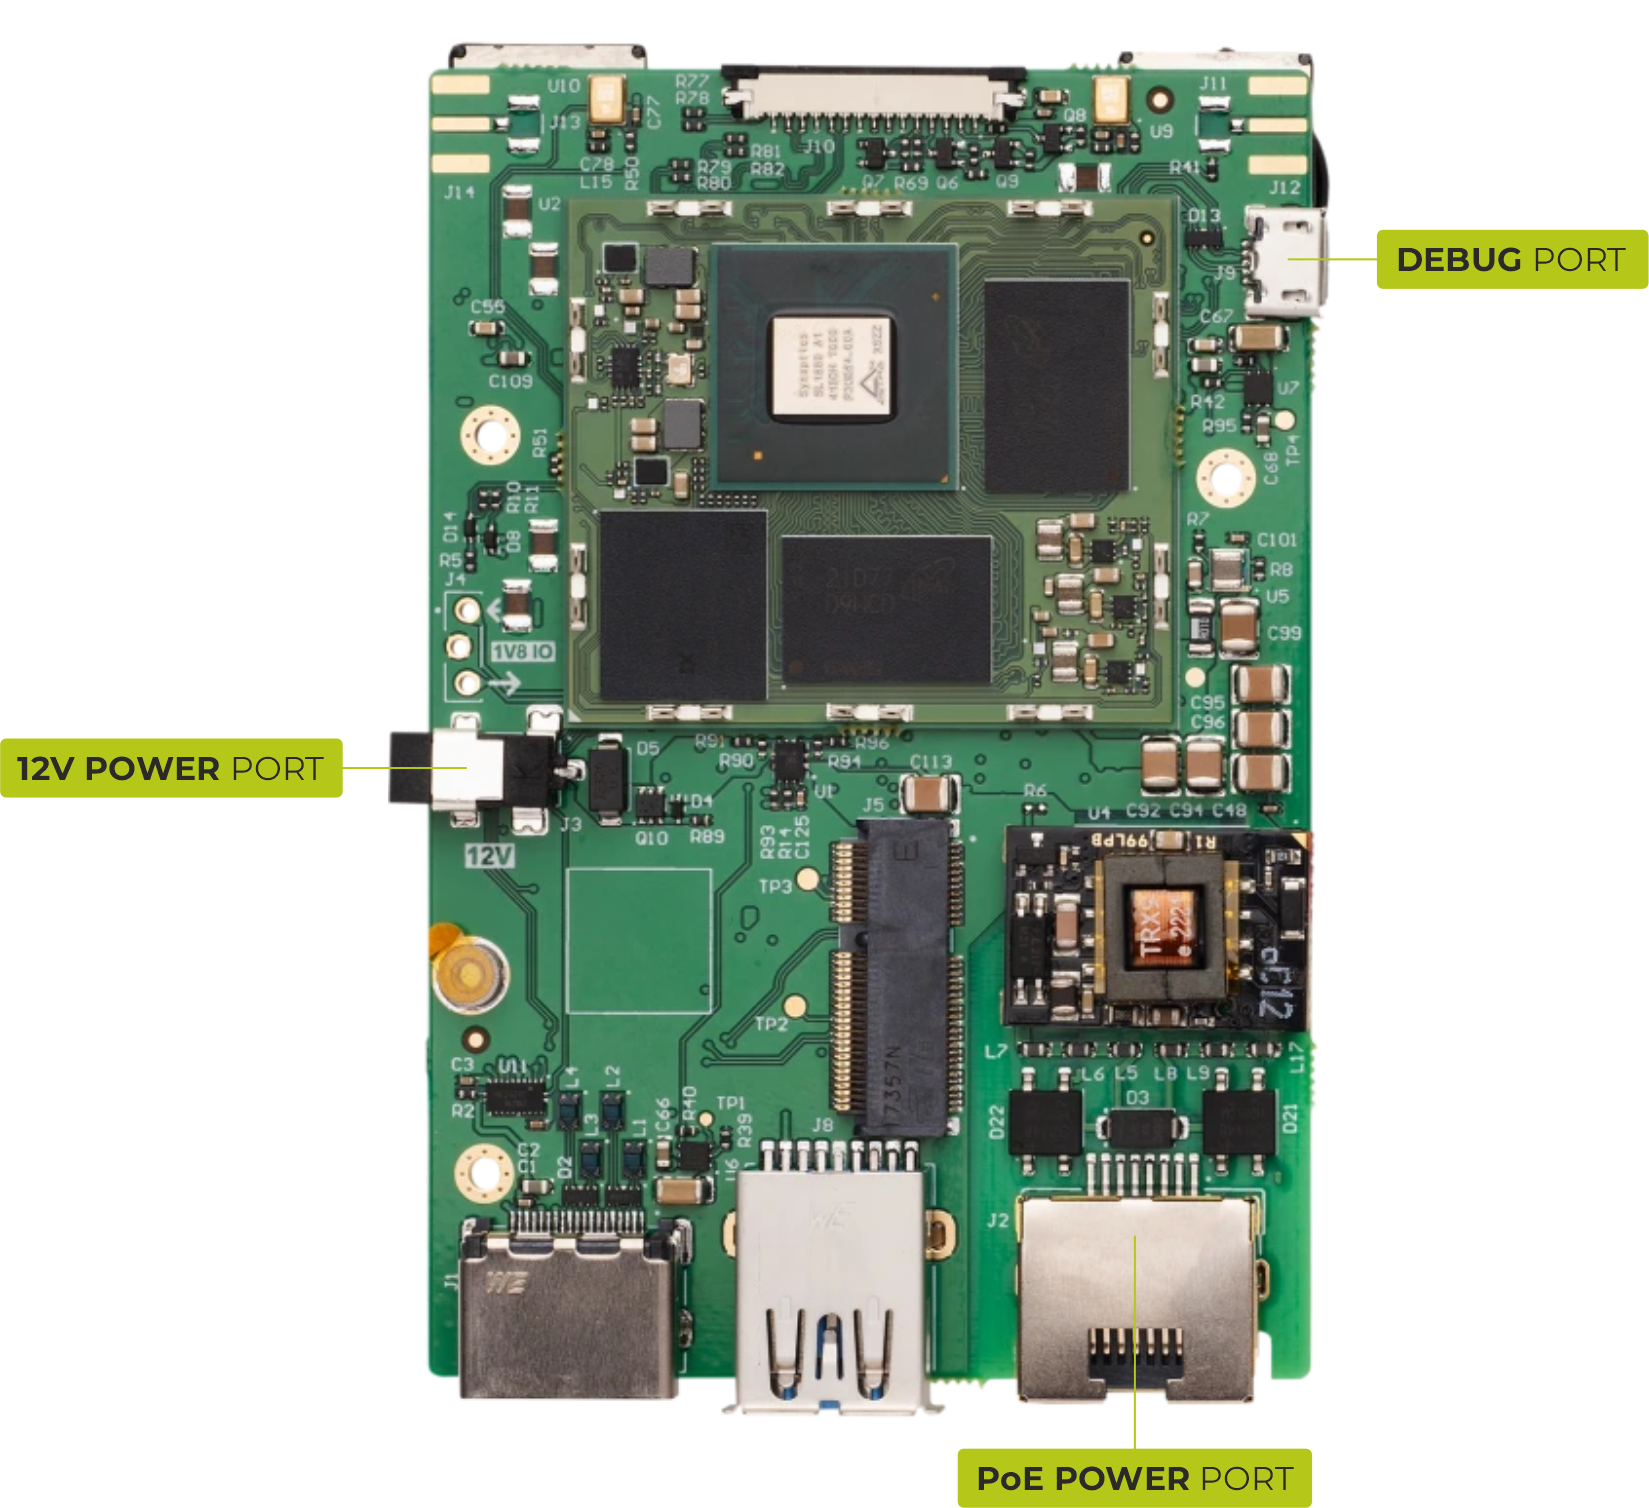
Flashing Grinn AstraEVB-1680 requires:
external PoE (recommended) or 12V power source,
Debug USB port connected to the host PC.
Flashing
Open the previously prepared terminal and run the flashing tool:
./bin/linux/x86_64/astra-update -f ./path/to/SYNAIMG
.\bin\win\astra-update.exe -f .\path\to\SYNAIMG
Once the tool is ready, put the device into download mode
.
Note
The flashing tool displays progress updates in your terminal.
Do not disconnect your device or interrupt the process until it completes successfully.
Download Mode
The board must be in download mode to start flashing the firmware.
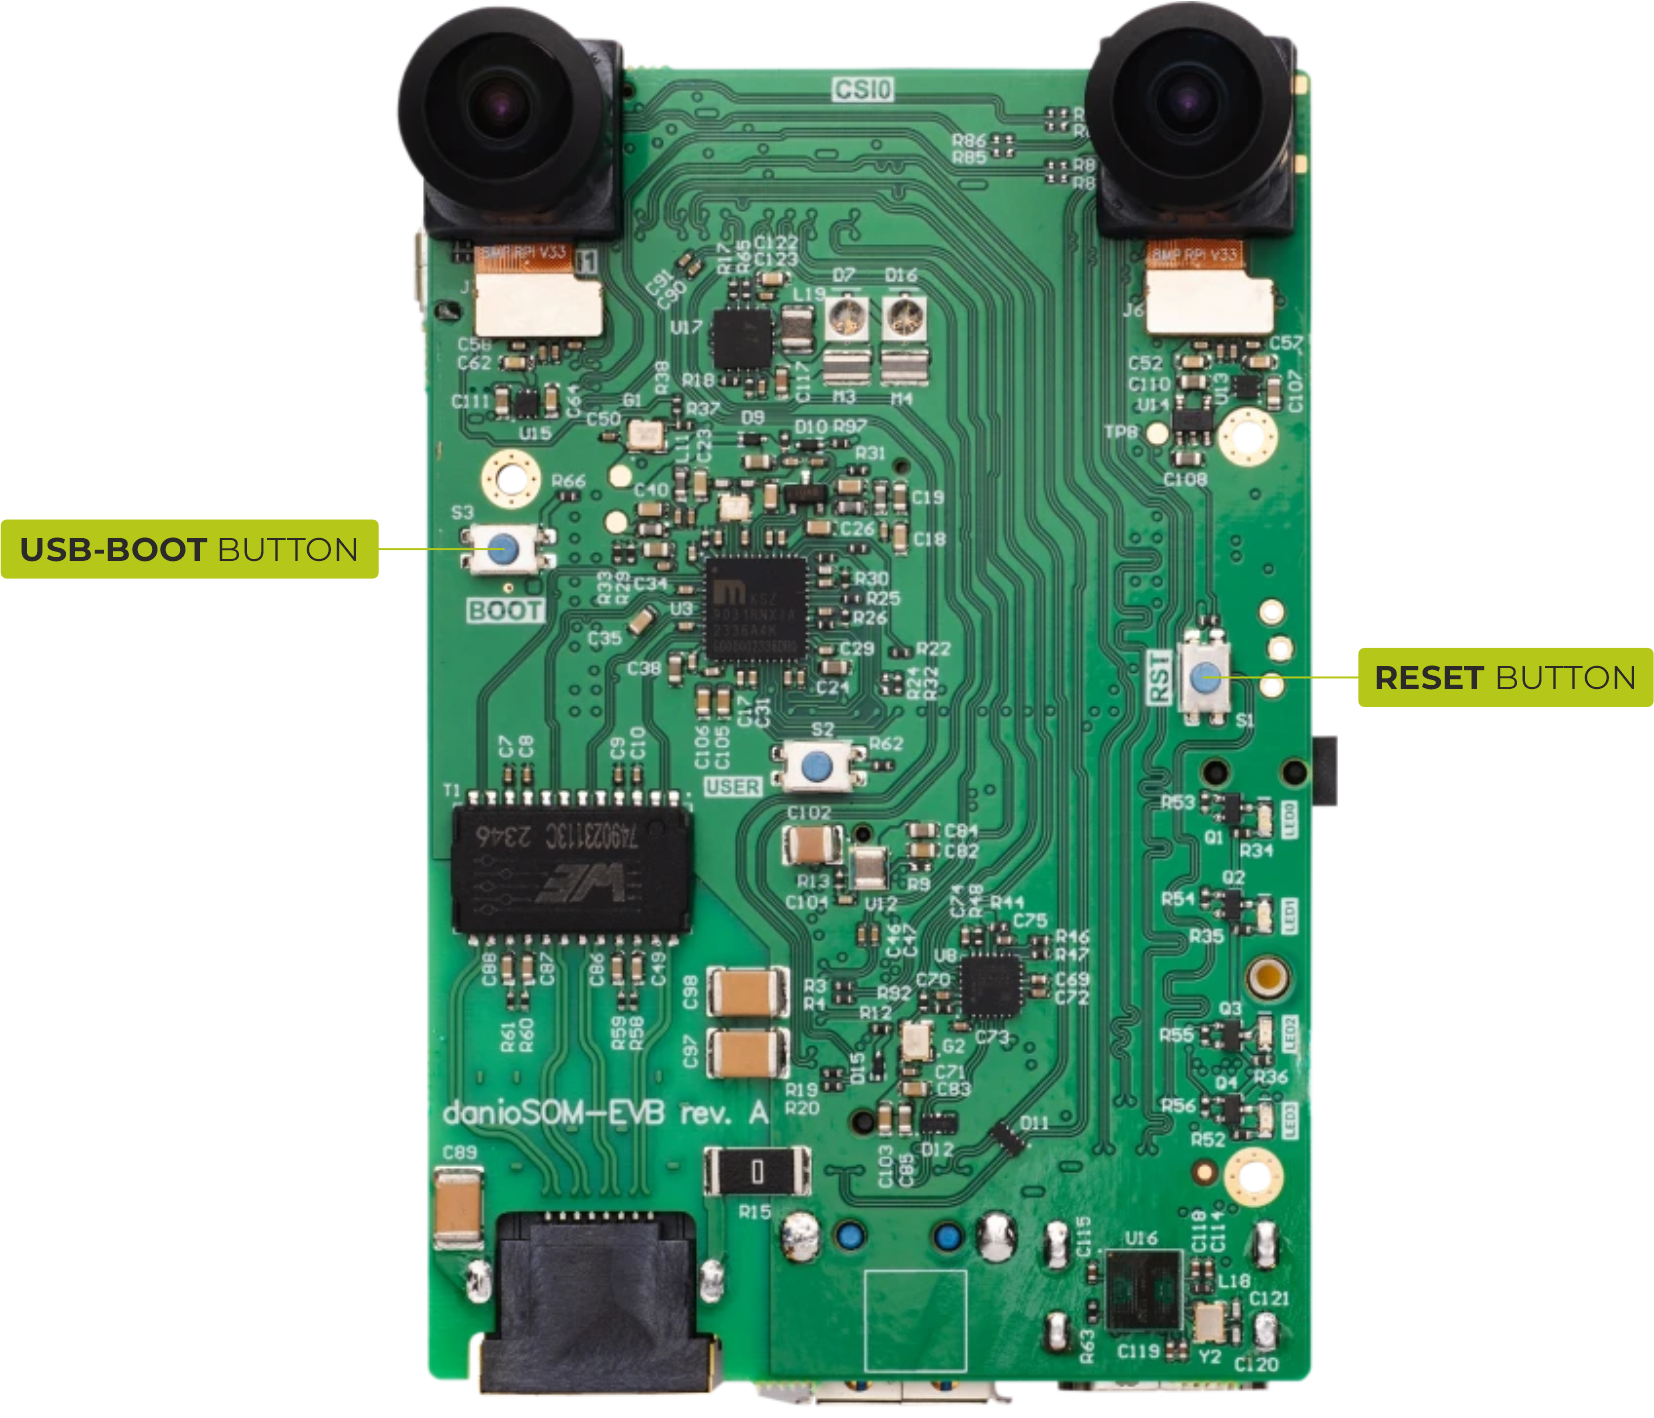
Locate the RESET and USB_BOOT buttons on your device (see the picture below).
Press and hold both buttons at the same time.
While still holding USB_BOOT, release RESET.
After a brief pause, release USB_BOOT.
Grinn AstraEVB-1680 should now be in download mode.
Note
If the flashing process does not start, try adjusting the hold times for the USB_BOOT and RESET buttons.
Troubleshooting
Failed to boot device / Device not detected
You might see messages such as:
Boot Failed: Timeout during boot, press RESET while holding USB_BOOT to try again
Failed to Boot Device
To resolve this, ensure the device is correctly in download mode by repeating the steps in the Download Mode section. Also check your USB cable and connection.
Flashing tool errors
For specific error messages, refer to the Synaptics usb-tool documentation.