LoRa Gateway
|
Features |
Schematics
Production files
Start guide
Firmware
There are two ways to get the firmware:
- download the image,
- build.
Image
Available soon.
Build
Download and extract the buildroot release:
  wget https://buildroot.org/downloads/buildroot-2018.08.tar.gz
  tar xf buildroot-2018.08.tar.gz
Clone Grinn examples repository:
git clone https://github.com/grinn-pub/examples.git
Configure the buildroot:
  cd buildroot-2018.08
  make BR2_EXTERNAL=<path/to>/examples grinn_loragw_defconfig
where <path/to> is path to cloned Grinn examples repository.
Build the firmware:
make all
After successful build microSD card image sdcard.img can be found in output/images/ directory.
Bootable microSD card
After getting the firmware, flash a microSD card with sdcard.img file:
sudo dd if=<path/to>/sdcard.img of=/dev/<sd_card> bs=1M
where <path/to> is path to built or downloaded firmware image and <sd_card> can be sdX or mmcblkX.
Board preparation
- put flashed microSD card into the socket on the board,
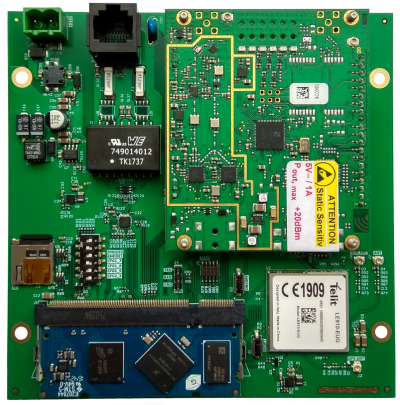
- connect an Ethernet cable and/or put your SIM card into the socket under the LoRa iC880A module,
- connect 868MHz antenna to the u.fl connector on the LoRa module (see datasheet page 7),
- connect GSM antenna to
ANT(J7) connector (if you want to use GSM module, optional), - connect GPS antenna to
GPS ANT(J13) connector under the LoRa module (if you want to get GPS position of your device, optional), - connect 12V power supply to the
J14connector.
Terminal connection
There are two ways to connect to a gateway:
- Via SSH (if the IP address is known)
- Via USB↔UART converter connected to the
DBG(J4) goldpins (baudrate: 115200, 8N1)
Log in as:
  user: root
  password: root
Configuration
To configure your device it's necessary to edit few files with embedded vi editor. (More about using).
Gateway EUI
In you own your EUI and want to assign it to the gateway follow point 1. If not follow point 2.
1. Owned EUI
Log into the gateway and edit the configuration file:
vi /ttn/local_conf.json
Overwrite the gateway_ID value:
  ...
  "gateway_conf": {
      "gateway_ID": "<my EUI>",
      /* Devices */
  ...
Save the file and then run the following command:
sync
2. Generate EUI
Log into the gateway and type the following command:
/ttn/update_gwid.sh /ttn/local_conf.json
Response should looks like following:
Gateway_ID set to <EUI> in file local_conf.json
Then run the following command:
sync
3. Check EUI
To see currently set Gateway EUI run the following command:
grep "gateway_ID" /ttn/local_conf.json
reboot
GSM - APN & PIN
This paragraph consists information how to set up the Internet connection over the GSM module. If you want to use only Ethernet link you don't need to follow this part.
1. APN
Open the apn file with the vi editor (type the following command):
vi /etc/ppp/chatscripts/apn
edit the last string (default value is internet) according to the following:
AT+CGDCONT=1,"IP","<APN>"
Save the file and then type:
sync
2. PIN
If your SIM card doesn't have a PIN then you don't need to do this step. Otherwise follow the instructions.
Open the pin file with the vi editor (type the following command):
vi /etc/ppp/chatscripts/pin
change the default string:
AT
to the following:
AT+CPIN=<PIN>
where <PIN> is your pin e.g. 1234.
Then type command:
sync
reboot
Registration
The Things Network
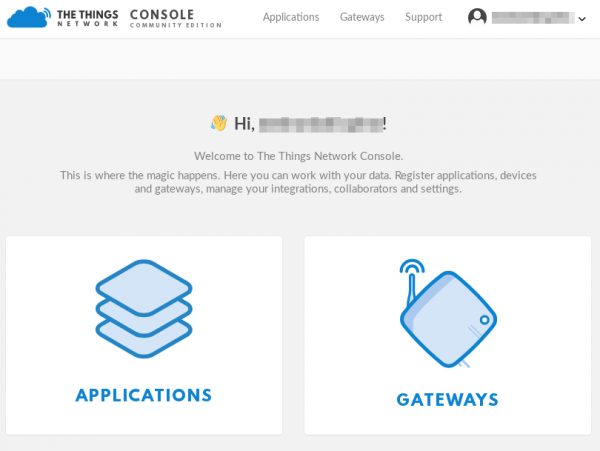
Sign up on https://www.thethingsnetwork.org/ and open console.
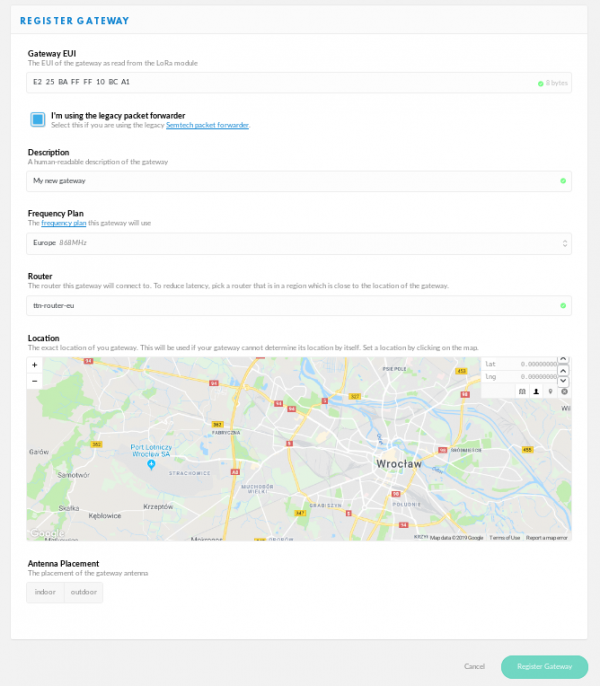
Choose Gateways and then Register gateway. Check option I'm using the legacy packet forwarder and type the gateway EUI which you own or generated in previous step. Choose frequency plan and router according to your region.
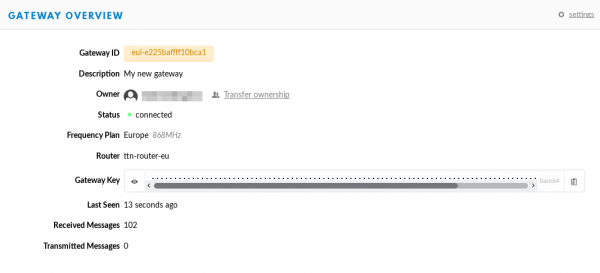
Register your gateway and restart it. After few minutes you its status should change to connected.
Other LoRaWAN network
To work with other LoRaWAN network it's necessary to adjust the gateway configuration.
Log into the gateway and edit the configuration file:
vi /ttn/local_conf.json
Find section servers and add new instance or edit existing one. The gateway can forward packets to maximum 4 servers parallelly.
  ...
  /* node servers for poly packet server (max 4) */
  "servers":
  [ { "server_address": "127.0.0.1",
      "serv_port_up": 1680,
      "serv_port_down": 1681,
      "serv_enabled": false },
    { "server_address": "router.eu.thethings.network",
      "serv_port_up": 1700,
      "serv_port_down": 1700,
      "serv_enabled": true } ],
  ...
for example:
  ...
  /* node servers for poly packet server (max 4) */
  "servers":
  [ { "server_address": "eu1.loriot.io",
      "serv_port_up": 1780,
      "serv_port_down": 1780,
      "serv_enabled": true },
    { "server_address": "router.eu.thethings.network",
      "serv_port_up": 1700,
      "serv_port_down": 1700,
      "serv_enabled": true } ],
  ...
Save file and type the following command:
sync
reboot


